Rainbow Path in Pixelmator
Step 1
Open Pixelmator and create a new document. I’m using 1800x1200px for the size. Then Click here to download this textured background picture and place it into the document and set the Opacity to 85%.
Add a new layer and with Paint Bucket Tool (N) fill the layer with yellow color. Then set the Opacity to 15%.
Add a new layer and with Rectangular Marquee Tool (M) make 6 even rectangles.
With Paint Bucket Tool (N) fill the rectangles colors as you like.
Deselect the selection Edit>Deselect all, then go to Edit>Transform and resize it to the image below.
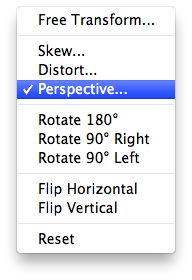
Go to Layer>Duplicate layer and duplicate the layer with colored stripes. Now go to Edit>Transform and choose Perspective Transform. Then make it like in image below.
Step 7
Then everything must look like that.
Click here I purchased this picture and with the Polygonal Lasso Tool I went around the people, then invert selection and delete everything around them. After that just place them into picture like in the picture below. If you want, you can change some colors like i did.
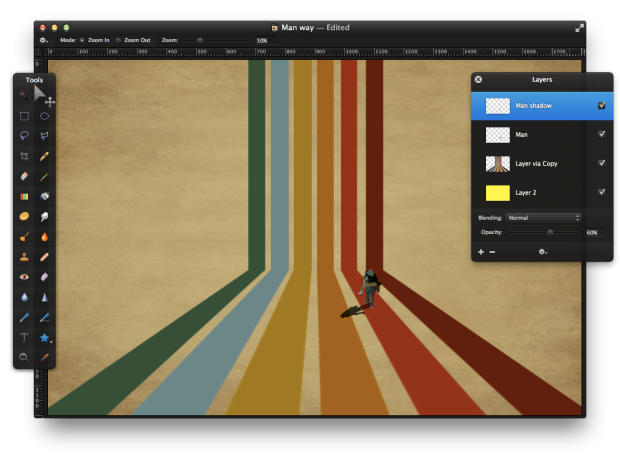
Go to Layer>Duplicate layer and duplicate “Man” layer then go to Edit>Transform and make it like the picture below. After that go to Image>Brightness and Contrast and change Brightness to -100%. Then set the Opacity to 60%.
Click here and download this textured background and then place it above all layers. Set the Opacity to 21%. And you can “Man” layer place above this layer, then he looks clearer.
Then make foot steps like in picture below, or do like you want. Don’t forget to make foot steps bigger as they get closer.
 And finally everything look like that. If you want you can add text, more people or something like that – as you like. And as you can see the process is not very easy, but it’s not hard too. Good luck by making!


Step 10 “Click here and download this textured background and then place it above all layers” Download link not working for me. Where did you get the feet from ?
We are extremely happy that you liked it!
Fixed the link, thanks for pointing that. (:
Just wanted to say thanks so much for posting your tutorials! I think that they are easy to follow and have inspired me to get creative!
Awesome tutorial. I have looked at several of your tutorials. Thank you so much for making them. A little hesitant about cancelling PhotoShop and go for Pixelmator but you are definitely giving me hope.